Manage activities
The activities in OSIRIS should ideally cover everything that researchers at your institution are involved in. The categories help to categorise the activities in a meaningful way and provide them with headings such as publications, lectures or teaching. Individual types can be created within a category, which then represent the template of an activity. This includes, for example, Journal Article, Book Chapter or Preprint.
By default, you will find the following categories and their types in OSIRIS:
- Publications
Types of publications
- Journal Article
- Non-refereed
- Book
- Book Chapter
- Preprint
- Thesis
- Further publications
- Lectures
Types of lectures
- Lecture
- Reviews & Editorials
Types of reviews & editorials
- Peer review
- Editorship
- Review of a thesis
- Other review
- Poster
Types of posters
- poster
- Students & guests
Types of students & guests
- students
- Theses
- guests
- Teaching
Types of teaching
- Teaching
- Software & Data
Types of software & data
- Software & Data
- Awards
Types of Awards
- Award
The categories are marked with a colour, which is also reflected in the list of types. You can edit the existing categories and types: Among other things, you can change the colour and icons, change IDs, names and descriptions and adjust data fields. You can also create new categories and add types to existing or new categories.
Create new category
You can add a new category under Contents → Activities.

Page to create a new category
First you have to choose a unique ID. By clicking on must be unique you will see a list of all IDs assigned. By clicking on icon you can choose a suitable icon for your new category by simply copying the corresponding text into the field.
On this page, you can also set which roles in OSIRIS can see the activities entered in this category. This is useful for confidential entries, for example. Every user can generate entries for this category and see their own entries, but not the entries of other users in this category. For example, if patents are entered in OSIRIS at your institute, each person should perhaps be able to enter a patent and continue to see this in their own history, but other patent entries will not be displayed.
Create new type
You can add new types to categories. Here, too, you need a unique ID and can choose an icon. The colour of the type adapts to the category. You can also change the colour spontaneously while creating the new type. The description you have chosen will be displayed to users as an info box when creating this type of activity and should describe which entries this template is suitable for.

Page to create a new type of activity

The description you have selected will then be displayed in the activity template from
Be aware that if you select This type of activity should be visible in OSIRIS Portfolio, all activities entered under this type will be visible to the outside world via the website. Once you have saved, your newly created type of activity should appear in the category listing and will be available for any user to make an entry.

The newly created category Volunteering with the newly created types Works council and Job and family.
Form builder
With the new form builder, you can design the templates for activities even more flexibly. You can access the builder by clicking on edit next to the data fields.

Clicking on edit takes you to the form builder.
The form builder is divided into two parts: On the left the fields and layout options that you can add to your form and on the right all the fields that you have added to your form. Here you can directly see the standard fields Title, Author and Date, which must be entered for every activity. You can change the order of the fields by holding them on the left edge and dragging them to the desired position.
On the left you will see a search field to search through all available data fields as well as filter options by topic. You will also see the layout options Heading, Divider and Paragraph, which you can add to your form as you wish.
The list of data fields starts with the custom fields you have created. For information on the data fields, click on the question mark on the right.

The form builder in OSIRIS with which you can customise the activity template.
You can always display your created form by clicking on Preview - remember to always save it first!
At the top right you will see a button that allows you to load existing forms from OSIRIS and customise them according to your requirements.
 Your existing form will be overwritten by selecting a template - but only once you save.

After selecting the Poster template, additional fields were added to it to document a presentation. The layout elements were used and headings, descriptions and dividing lines were added so that the two pieces of information could be easily distinguished from each other.

Once everything has been saved, you can view a preview of your form.
In the preview, you can see how your form components have been implemented by OSIRIS and how users will see the template when they make a new entry for an activity.
Each field can be edited, marked as a mandatory field or deleted with a single click. For some fields, you can add help for users, which they will see when they click in the field.
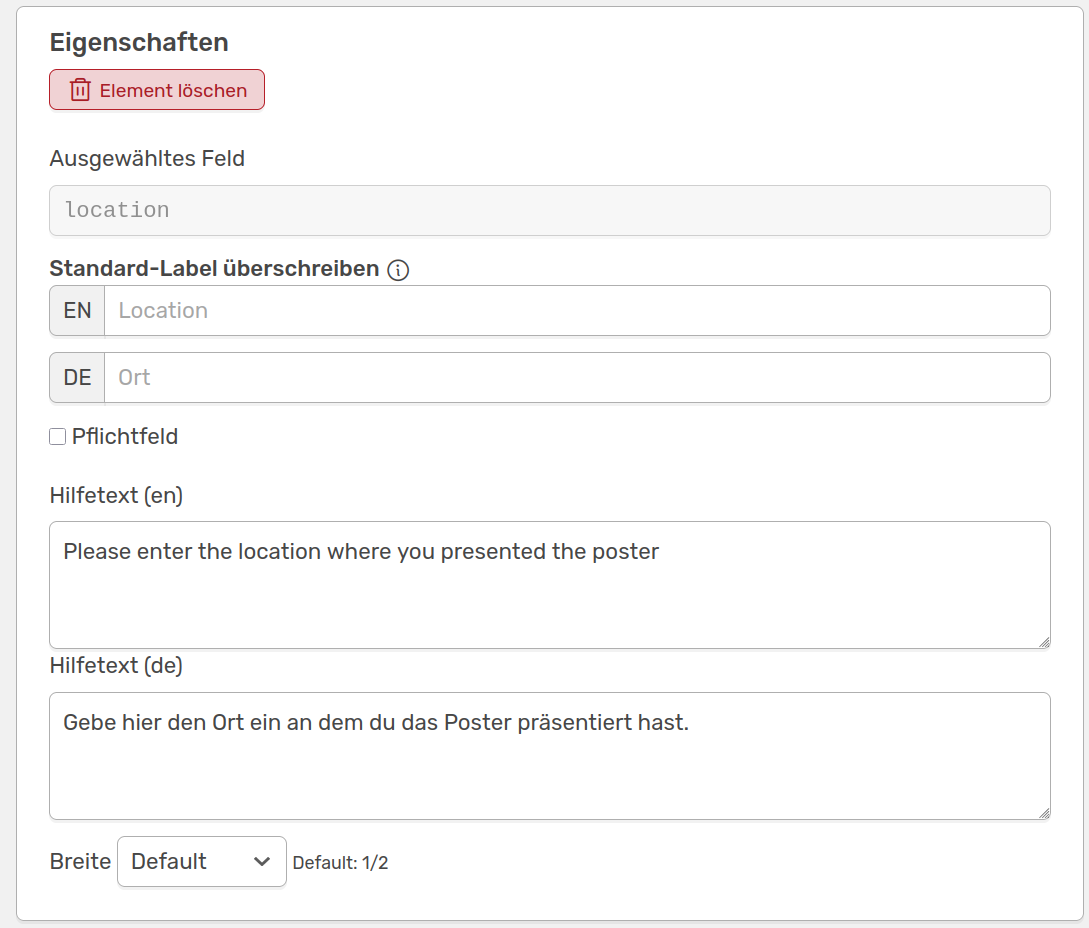

At the top you can see the Properties field for the "location" data field. Here you can add a help text that users will see when filling out the form, as shown in the image below.
The properties fields differ depending on the data field, but always contain the delete button. You can also customise the width of the data field here.
Once you have saved all changes, users can find the modified template directly in the activities.